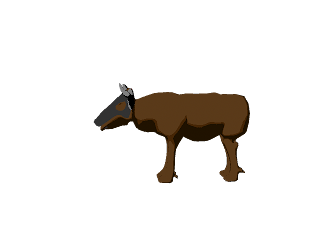
Another animal model that I needed to rig for the Serengeti project was a fish eagle. As I was not sure how many joints to place in its wings, I used this video as a reference.
When I rigged the fish eagle, there were quite a few issues such as the wings moving with the tail and the feet moving with the wings and tail, but I resolved these by putting quite a lot of work into the painting weights.
Tuesday, 30 November 2010
Monday, 29 November 2010
More cell shading
I have cell shaded some models of various parts of the environment, that were modelled by Alex. Here are the outcomes, I have also experimented with shade
With the mountain texture, I had a go at creating the sense of light leaving the surface, through key framing the ramp shade of the texture.
With the mountain texture, I had a go at creating the sense of light leaving the surface, through key framing the ramp shade of the texture.
Ocean shader
Here is another ocean shader test I just did, in order to complement the style that we are going for. This still looks quite realistic, but I have increased the diffuse to increase the vibrancy.
Tuesday, 23 November 2010
Texturing tests for the wildebeest
Here are some various textures that I have applied to the wildebeest. These are all Shaded Brightness Two/Three Tone textures.
And here is a test animation to see how an animated model looks with cell shading.
Wildebeest is done!
As far as the rigging is concerned anyway. I have managed to fully rig the wildebeest with very little trouble.
This is largely because I raised the problems I was having with the elephant and rhino rigs with the tutor, namely how the whole geometry of these rigs was influenced by the leg joints. He showed me a tool called the Paint Skin Weights tool which is used to control the influence each joint has on certain areas of the geometry. This is done by painting areas that are supposed to have little influence from certain joints black; and areas that have a lot of influence from joints white.
I used this tool on the Wildebeest straight after I had rigged and applied a Smooth Bind. I have also applied this to the Rhinoceros. I still need to do the elephant!
Monday, 22 November 2010
Texturing experiments with Rhino
I've done a few experiments with the texturing; we are still trying to decide between the "cartoon effect" of cell shaded textures of if we want to have some realistic texturing as well.
Here are some images of a rhino with Shaded Brightness Two Tone textures; I played around with different shades of black, grey and blue.
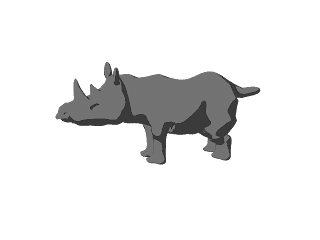
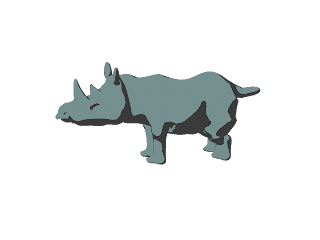
And here is a rhino, which has been textured with a Photoshop file, based on the skin of a rhino.
Here are some images of a rhino with Shaded Brightness Two Tone textures; I played around with different shades of black, grey and blue.


And here is a rhino, which has been textured with a Photoshop file, based on the skin of a rhino.
I still need to brush up UV Mapping, but I have a tutorial tomorrow; but here are some clear styles that we can play with.
Fully rigged rhino
I have fully rigged the rhino that was modelled by Perri, it looks good but I am considering replacing the FK handles in the legs with IK handles to make animating the movement easier.
The next stage is to experiment with the texturing of this beast.
Wednesday, 17 November 2010
Cell shading test
I have been doing some reading/video watching on cell shading after this was recommended to me by the producer of our group, Gary. It is actually fairly simple once you get started; it just involves using several fill shaders in Maya, from the 'Toon' Menu
The sun and sky in this are just simple Solid Colour textures, whereas the trees and terrain are Two Tone and Three Tone Shaded Brightness textures; which have had a Ramp shader applied. I simply created the sense of lighting as the sun rises by keyframing the ramp shader, so the ratio of black to brown/white eventually decreases. Although, I know that the timing is a bit off in this video.
The sun and sky in this are just simple Solid Colour textures, whereas the trees and terrain are Two Tone and Three Tone Shaded Brightness textures; which have had a Ramp shader applied. I simply created the sense of lighting as the sun rises by keyframing the ramp shader, so the ratio of black to brown/white eventually decreases. Although, I know that the timing is a bit off in this video.
Tuesday, 16 November 2010
Another sun test, now more red
This afternoon, I played with lighting and texturing, particularly in relation to the sun and sky in our Environmental project. I managed to make yet another sun and sky test, this time a sunrise, as opposed to a sunset; and I loosely based it on the Lion King.
I rendered this test using Maya Software and I have managed to achieve the red effect that we were seeking.
I simply used lights, which I textured red, to create the lighting effect across the terrain. As for the sky itself; the sun is just a polygon sphere which I textured with a yellow Lambert and added a Glow Intensity. The sky is a polygon plane that I textured with a Ramp.
I now need to show this to the rest of the group to see what they think
Monday, 15 November 2010
New sunset test
Here is another shot at creating sunset using mental ray. This time, much longer with a larger sun and with a little ambient occlusion, can you tell the difference?
I still need to try and make the sunset more red towards the end, as it does in hot open areas; much like first 31 seconds of The Lion King.
I still need to try and make the sunset more red towards the end, as it does in hot open areas; much like first 31 seconds of The Lion King.
Sea tests
Here are a some tests that I did to create water for our Serengeti, I made them a while back but forgot to post them up. I made these by applying an Ocean shader to a polygon plane and I then used key frames to play with the timing.
Here is an earlier test that is a bit too strong for a calm wilderness environment
Here is an earlier test that is a bit too strong for a calm wilderness environment
And here is test with a lake that has a calmer flow. This is closer to what will appear in the final piece.
Sunday, 14 November 2010
London Zoo Trip 9/11/2010
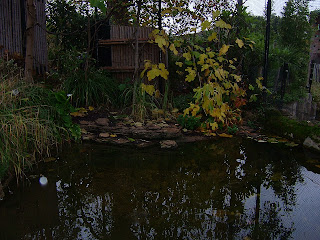
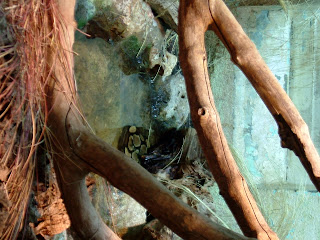
Last Tuesday, I went with my Digital Environments group to London Zoo to study the environment as reference for our Serengeti project. As Texture Artist for the project, I made sure I focused largely on the textures within a wilderness environment, as well as the animals that interact with this environment.
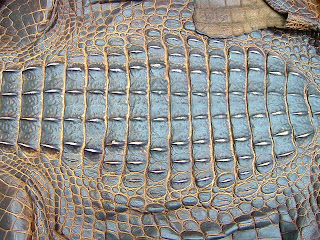
The next few photos were of skins from a crocodile, when I get up to speed on UV mapping, I could directly texture the crocodiles with these images.
Monday, 8 November 2010
V & A / British Museum visit
Today, we went to the V&A and British Museum to study how various environments work. There was not much to inform our project at the V & A, but we found a whole Africa section in the British Museum that featured masks, sculptures, textiles, pottery and furniture from Africa.
I took quite a lot of photos of the various artefacts so that I could study the texturing, so I know what to do when I am texturing the various models in the environment.
I also bought two books on African art and cultures, as well as a book on Silk in Africa, so that I could study the various patterns that are used in African art, but largely that of Tanzania and Kenya as that is the region that we are basing our environment on.
Tinga Tinga Tales
An animation that I came across when researching styles that we could use in presenting our Serengeti was Tinga Tinga Tales.
I think it would be useful to look at if we wanted to go down the extremely stylistic route.
Sky and Sun tutorial.
One of the first things I did when I was looking at texturing was experimenting with ways of creating the sky in this wilderness, as well as the sunrise and sunset.
I came across this tutorial which explains how I can create a sky by using the Mental Ray rendering software, which is built into Maya: http://en.9jcg.com/comm_pages/blog_content-art-109.htm
I created this test scene of the sun setting by following the tutorial:
I think it is a quick way of creating various sky effects, but the only downside I have found is that rendering takes much longer and it seems that the sky does not show up in the video file, unless you save it as a video sequence in FCheck.
I will continue to explore ways of playing with the colour of the sky itself to get a more red texture and also methods of including clouds.
ANI206 Digital Environments/Visual Studies
The next few posts that I will be putting up here will be related to what I doing for a particular unit at uni called Digital Environments/Visual Studies, as I will need to be marked on an individual basis. I will include research that I have done, as well as various tests in Maya; as well as finished pieces of work.
So far, it has been decided that we are going to produce Gary Ralphs' idea, which is an African Wilderness environment, largely based on the Serengeti that will feature a number of animals and will take place in the space of a day.
It has also been decided that I shall take on the jobs of Texturing and Rigging for the project. This will involve texturing the environment, creating the sky (particularly the sunlight at various times of the day), texturing and rigging the animals the will function within the African Wilderness environment.
Over the next few posts, I shall present various images, videos and photos as reference for our project; as well as tests in Maya. I will also still be sharing my research on the group's shared blog: http://jpagenvironment.blogspot.com/
Friday, 5 November 2010
220 out of 256
Ok, I've just found that I finished 220th place in October's 11 second club competition; however, there were far more people entering this month and at least I got I higher star rating average (2.96 stars in October, compared to 2.86 stars in June).
I got more positive feedback than last time, but the main criticism was that my animating was lacking arcs and that I should have referred to a video of myself acting it out. I did use a mirror a to act out and reference my poses, but it may have made more sense to record a video.
Anyway, I probably won't be re-entering the 11 second club for a while, as I need to focus on my uni projects, which you can follow on the two blogs that I posted up in the "Spin-off blogs" post.
Tuesday, 2 November 2010
Vote
Its been a while since I've mentioned anything about it, but its time to vote on the 11 second club and my entry will be up there!! http://www.11secondclub.com/competitions/october10/
Subscribe to:
Comments (Atom)


